From a Raspberry Pi to a declarative, LLM-managed Lenovo Cluster
Prologue: Why “The Castle”?
I’ve loved castles since I was a kid. British-born but raised in the Valley, every trip back to the UK meant my grandparents taking me around another medieval castle. Walking through something so old, so solid—so much human effort poured into one structure someone hoped would keep them alive. Redundancy and layered defenses everywhere: ten-foot thick stone walls, multiple moats, food stores for sieges that might never come.
As a security engineer, now I build a different kind of castle. Defense-in-depth isn’t just a buzzword when you’ve walked through a castle designed to make attackers bleed for every inch. My homelab follows the same philosophy: layered, redundant, built to survive.
Unlike medieval castles built with stone and mortar, mine is built with code and silicon.
The Wooden Fort (2022)
When archaeologists dig on the sites of castles, they often find wooden remains of a fort that predated them. My fort was a Raspberry Pi 4 and a 6TB 2.5in USB hard drive.
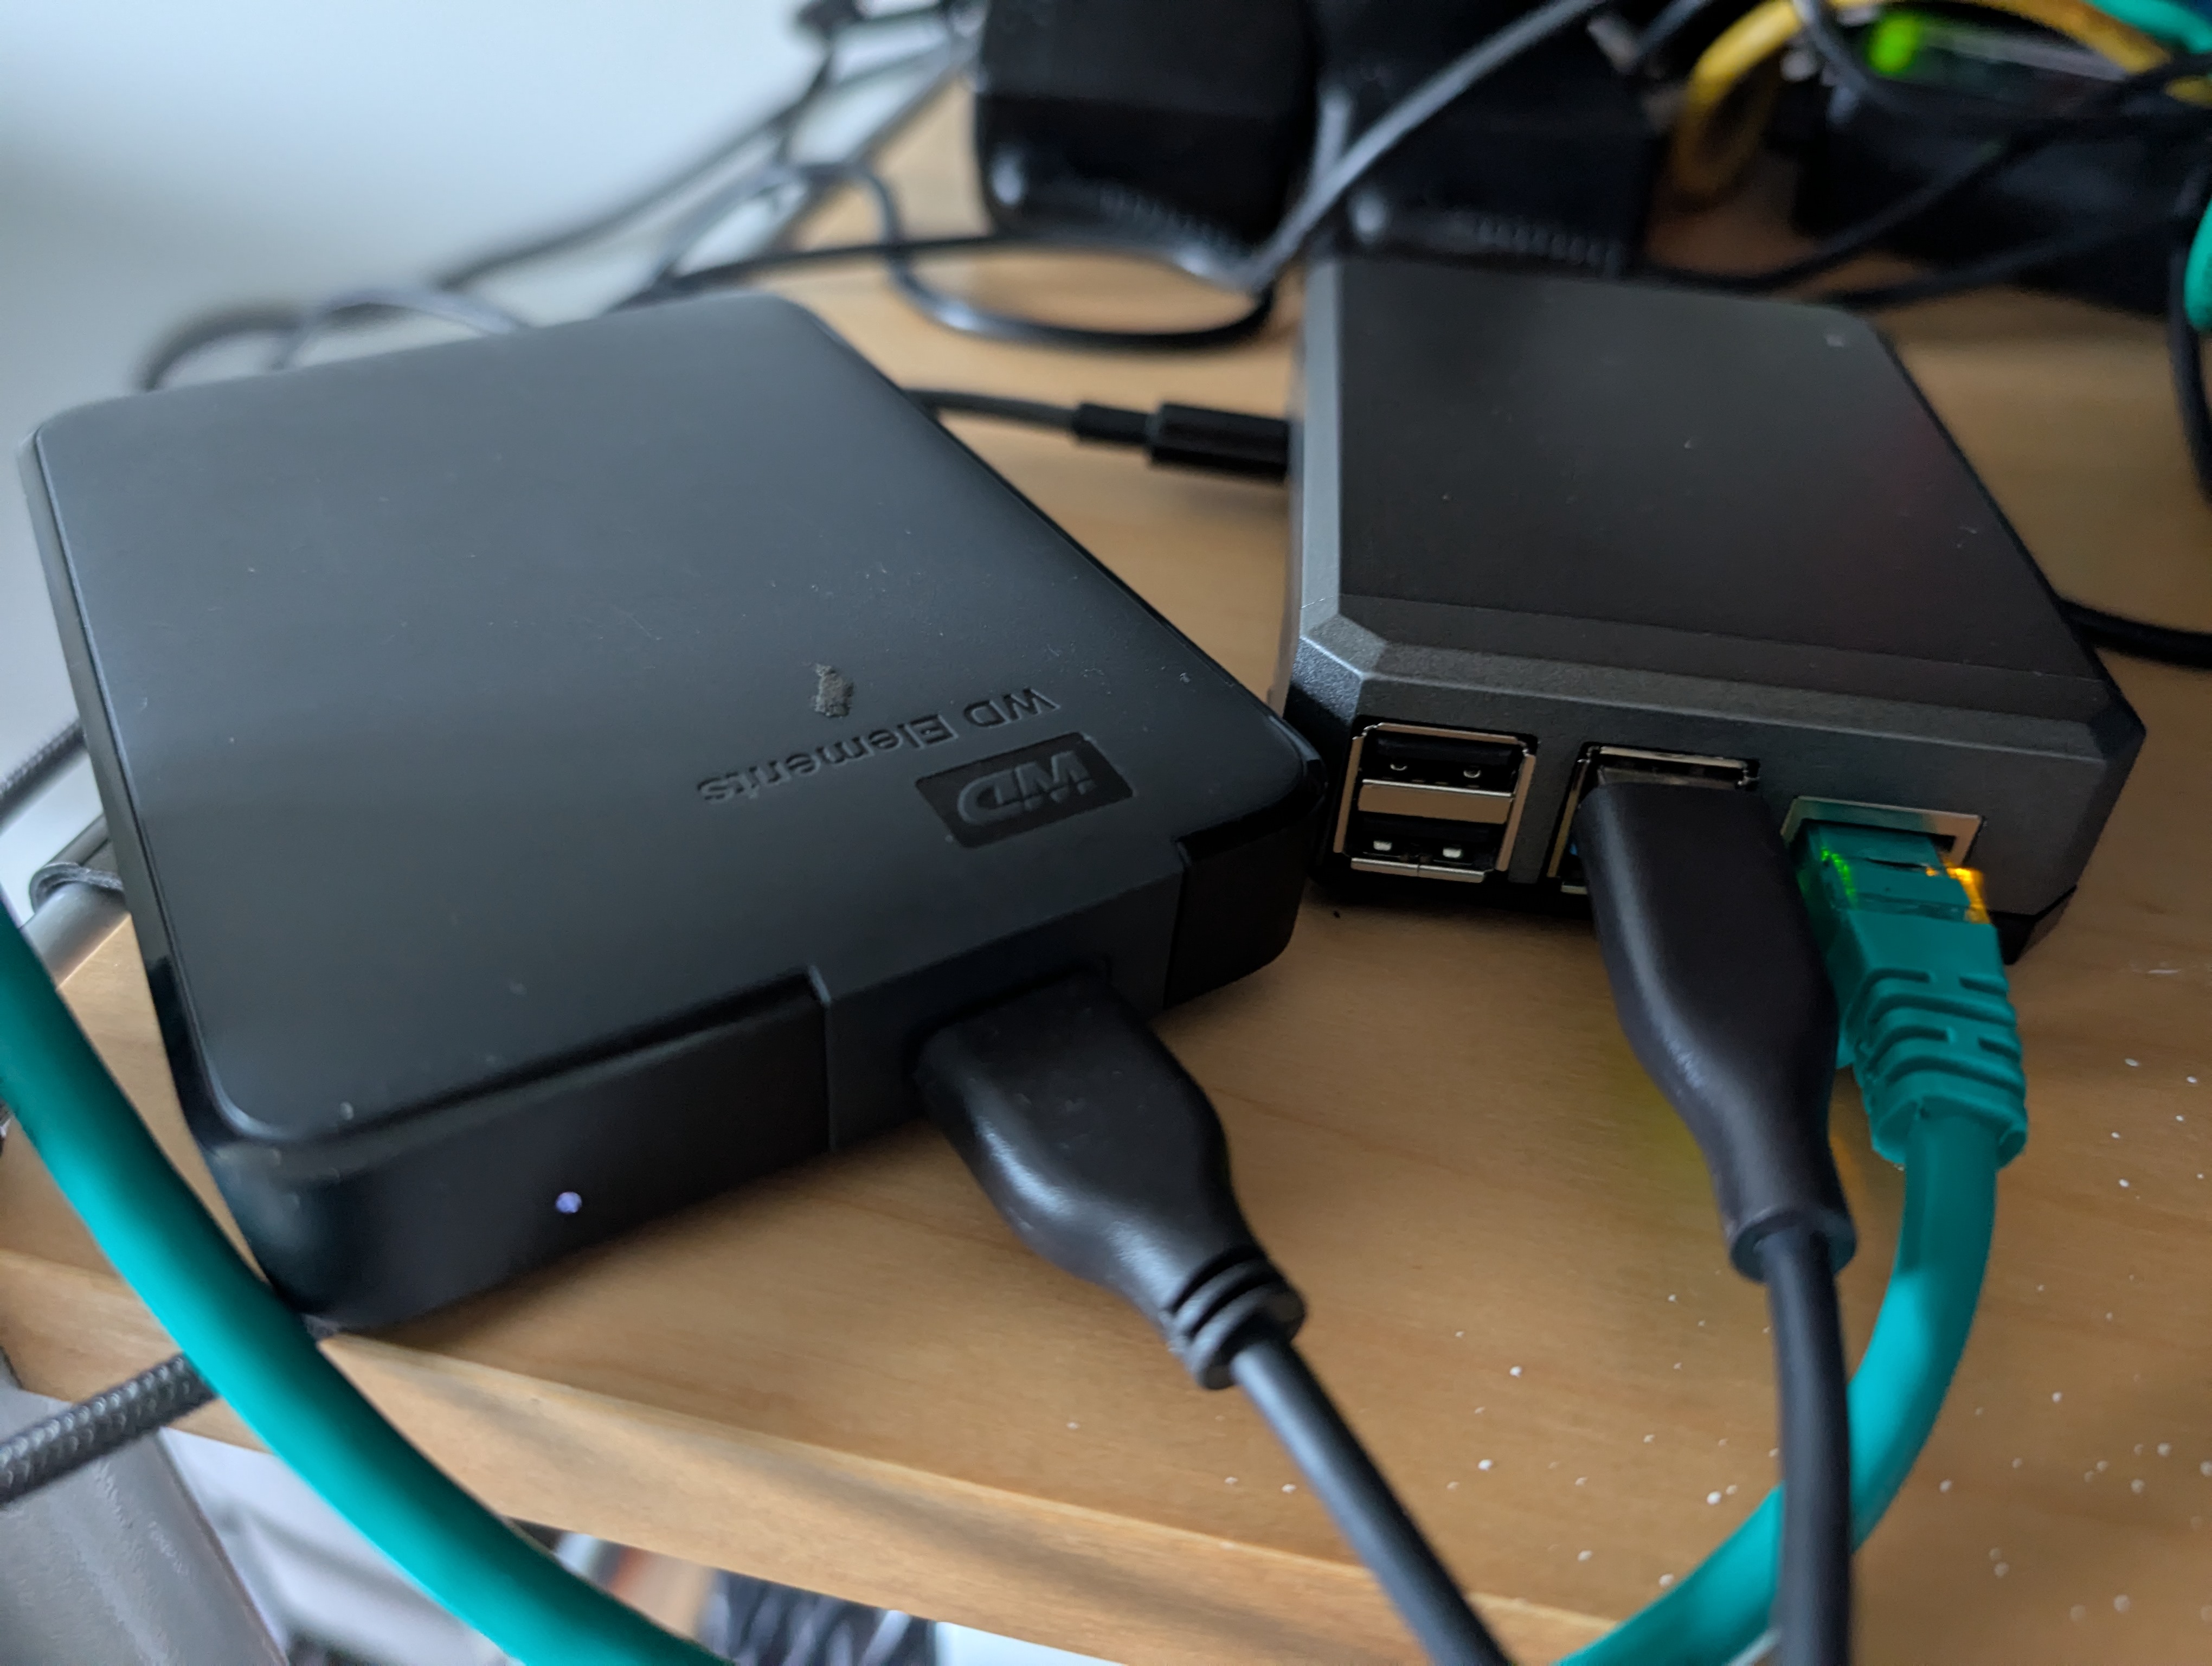
It wasn’t much, but it was mine. I ran:
- Pi-hole for network-wide ad blocking (the guard screening visitors at the gate)
- Unbound as a recursive DNS resolver (the messenger who only trusts verified sources)
- WireGuard for secure remote access (the secret tunnel under the walls)
- SMB share for backups to the USB drive
The Pi was perfect for learning. Low power consumption, cheap, with lots of beginner friendly documentation.
But it had limitations:
- Performance: The Pi struggled with anything beyond basic tasks.
- Storage: A single USB drive meant no redundancy. One failure and everything was gone.
- Availability: If the Pi went down (which it did, occasionally), everything went down with it.
As much as I loved my Raspberry Pi, it had quirks. Mysterious I/O errors, random hangs, services that needed manual restarts. It took me years to realize the root cause: my USB power cable couldn’t deliver consistent voltage to the external drive. By the time I figured it out, I’d already moved on—but not before racking up 1,720 commands in my shell history. Anyone who’s managed Linux servers knows that’s way too many. But that’s why you start small: to learn.
I wanted something I could put services on and still be using ten years from now. That meant backups, redundant storage, architecting, security from the get-go, secrets management, key management, and the ability to redeploy from backups in minutes when I inevitably broke something. A wooden fort wasn’t enough anymore. I needed a castle.
Building in Stone: The Proxmox Cluster
Enter Proxmox VE—an open-source hypervisor with built-in clustering and high availability.
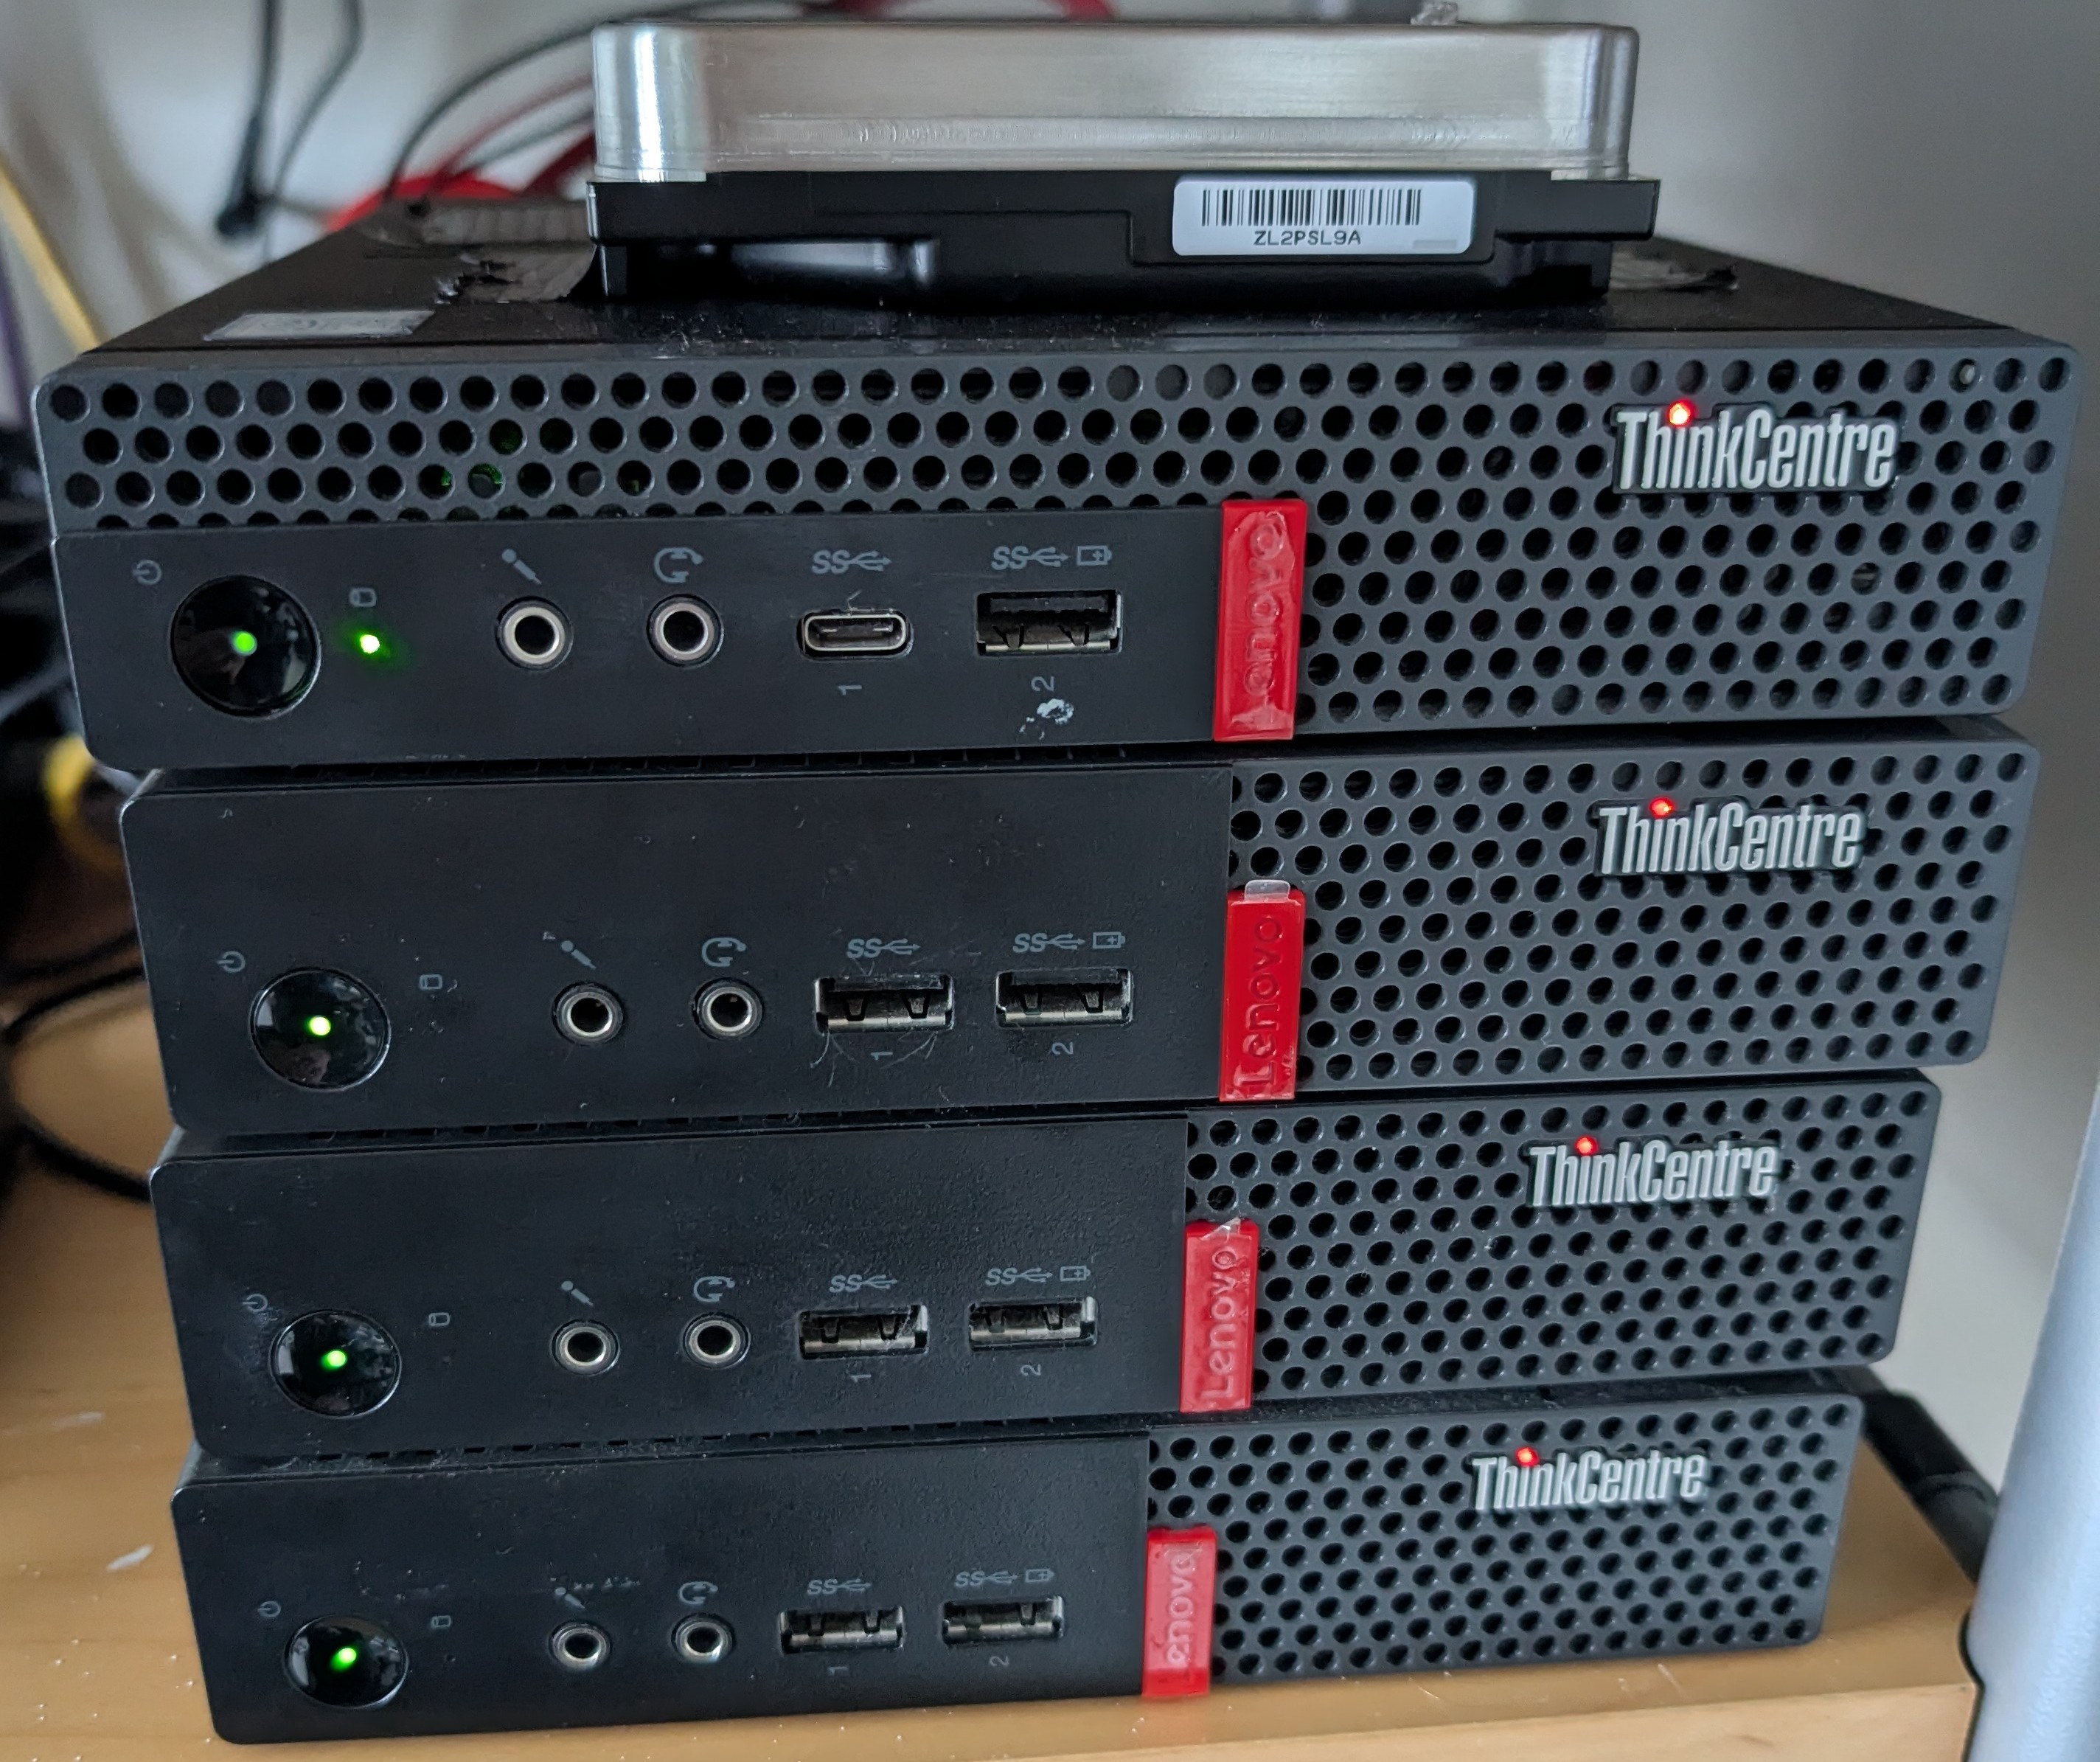
Being a longtime lurker on the homelab subreddit, I saw endless pictures of stacked Lenovo mini PCs running Proxmox or Kubernetes clusters. The community consensus was clear: the power-to-space-to-cost ratio of these mini PCs is hard to beat.
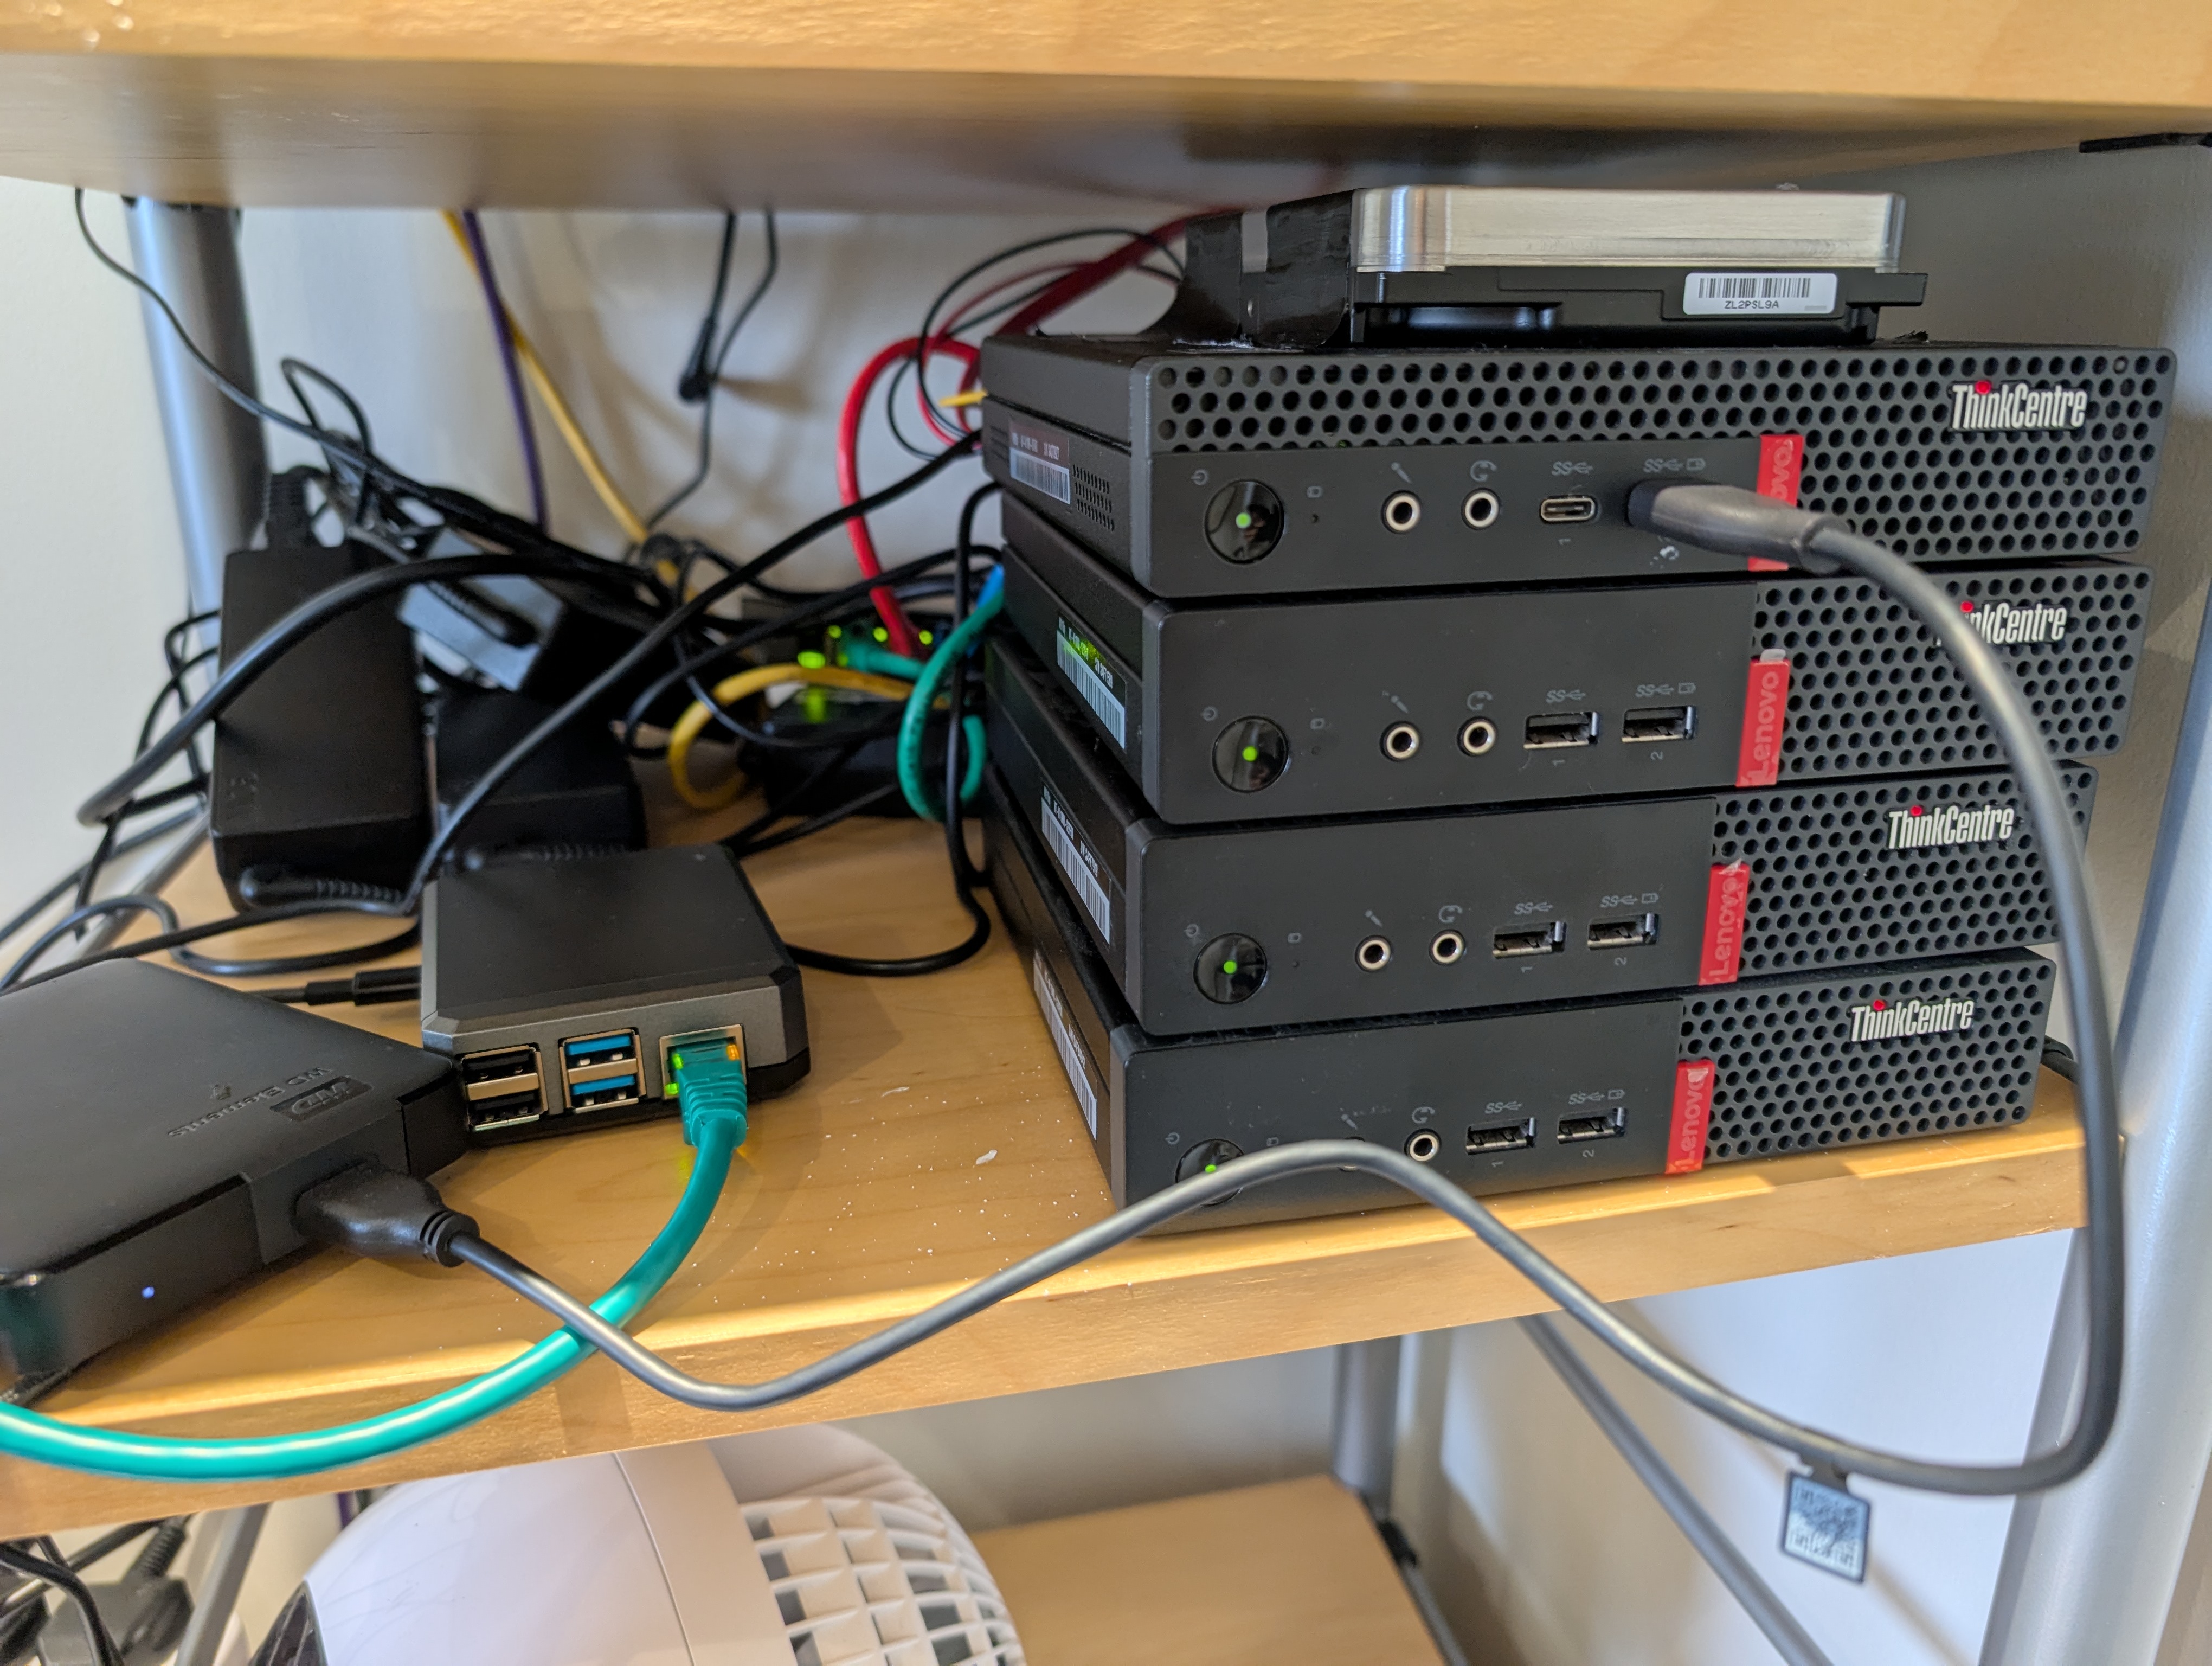
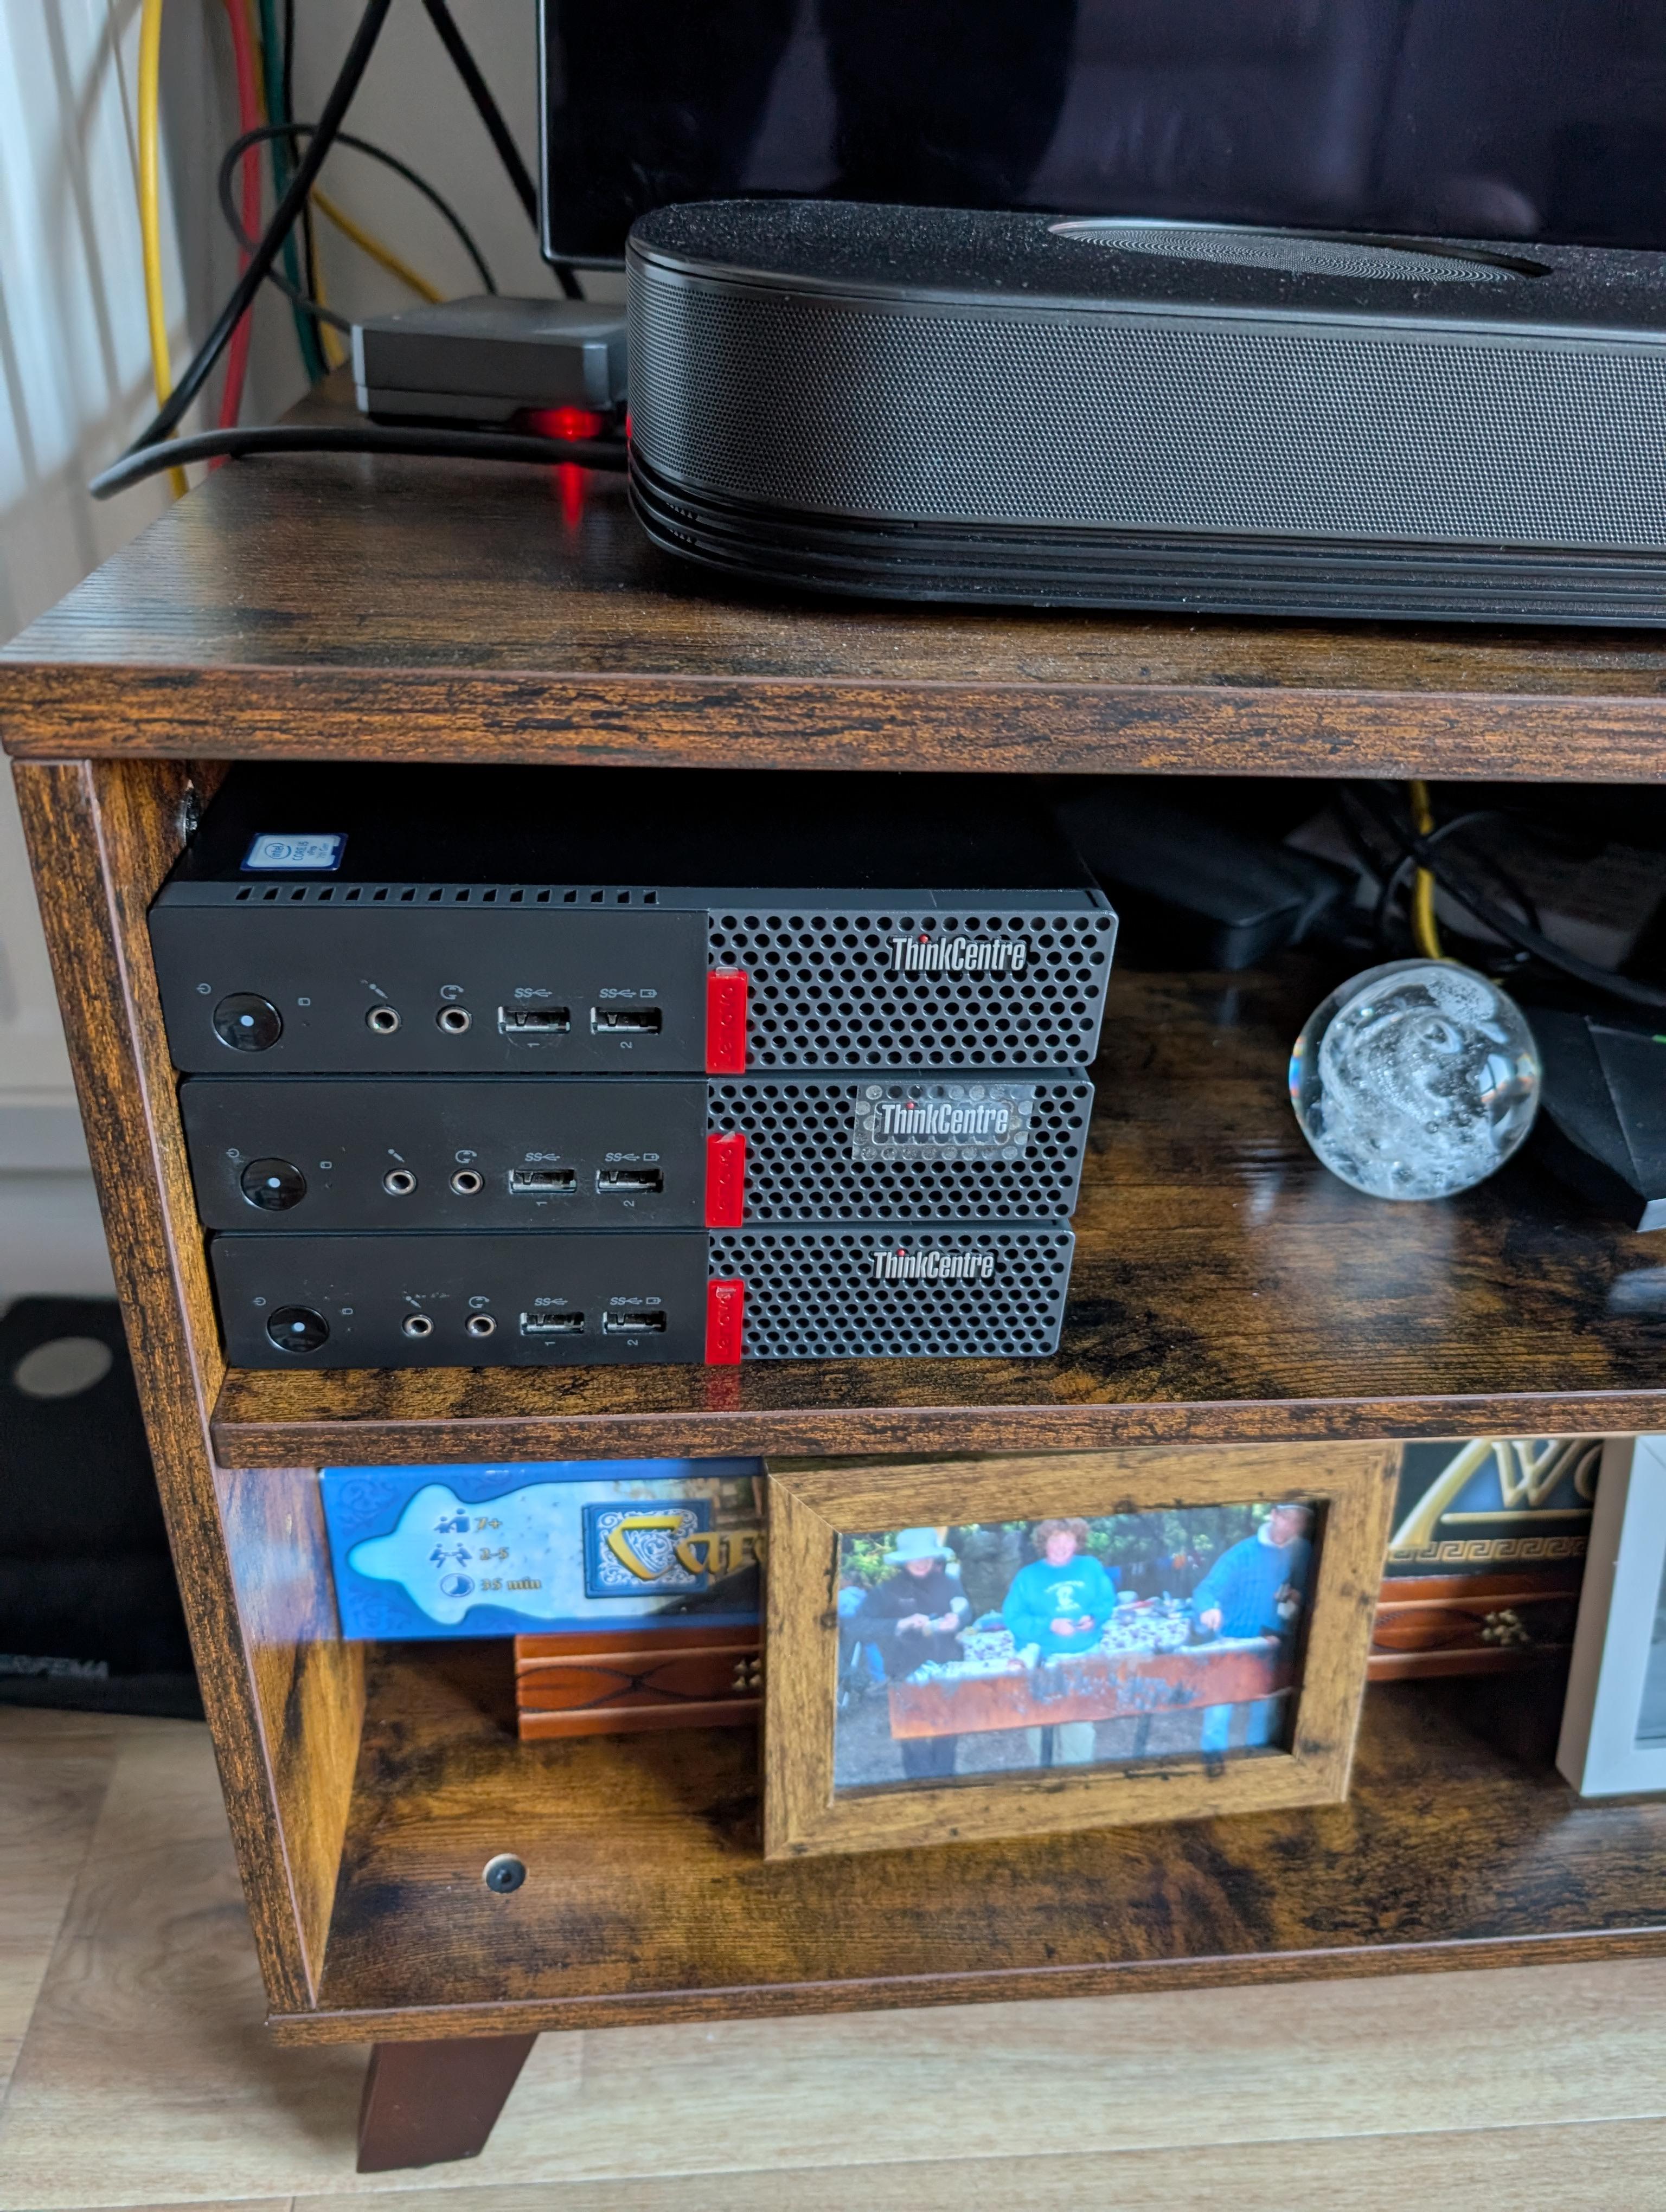
I found three Lenovo ThinkCentre M910Q units on eBay—refurbished, tiny form factor, perfect for a homelab. Each had:
- Intel i5-7500T (4 cores, 35W TDP)
- 8GB RAM
- 256GB NVMe SSD
For around £200 total, I had the foundation for a cluster. And running these shouldn’t cost me more than 30 pounds in electricity a year.
Stone Masonry: Building the Cluster
Setting up Proxmox was straightforward:
- Installed Proxmox VE on all three nodes
- Configured them as a cluster
- Set up ZFS shared storage across the nodes
- Enabled High Availability (HA) for critical containers

Now, if one node died, Proxmox would automatically migrate containers to the surviving nodes. No more single point of failure. I had solid foundations for my castle.
The Keep: The Media Server
The Proxmox cluster was great for reliability, and I ran it alongside my Pi for a couple of years. But it wasn’t optimized for media. I wanted:
- Hardware transcoding for Jellyfin (Intel Quick Sync)
- Large storage for movies, TV shows, backups, and music
- Low power consumption for 24/7 operation
The M710Qs didn’t have a SATA port for 3.5" drives.
So I acquired a Lenovo M920Q—a beefier tiny PC with an 8th-gen Intel i5. More importantly, it had Intel Quick Sync for hardware transcoding, a SATA port, and Intel vPro. I still needed to attach some real storage though.
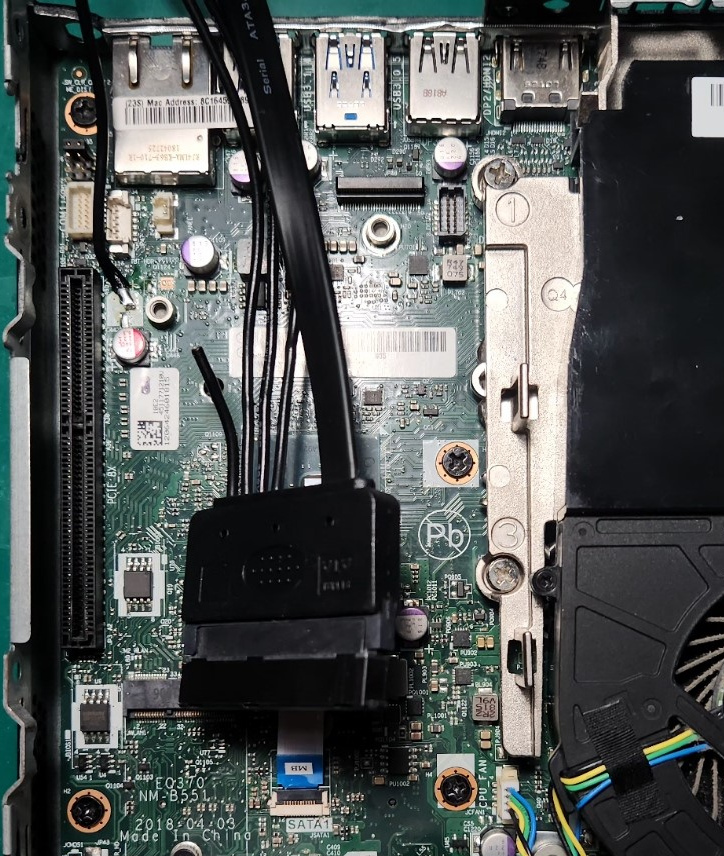
BlackSmithing: The Hardware Mod
I’m usually a man behind the keyboard—hardware mods are outside my comfort zone. But I discovered the M920Q 3.5" drive mod on GitHub, probably via the homelab subreddit again. The idea: solder a 12V wire directly to the motherboard to power a full-size hard drive.
Here’s what I did:
- Opened up the M920Q
- Soldered a wire to capacitor C442 on the motherboard (12V rail)
- Ran a SATA extension cable out the back
- Mounted a 16TB HDD externally (It’s literally just duct taped onto the top.)
It worked perfectly. The M920Q now had:
- 1TB NVMe SSD for the OS and databases
- 16TB HDD for media storage
- Intel Quick Sync for transcoding
I named it Volt—my dedicated media server.
Locking the Keep: The Encryption Decision
I spent some time deciding whether to encrypt it. You can find plenty of forum threads where people debate the merits of encrypting a home NAS. I decided yes—since I was using ZFS, encryption makes backing up to a remote provider like Backblaze B2 much easier. But it creates problems: a one-minute power blip means the server sits at boot asking for the decryption password, bringing down any service running on Volt.
An Attack While the King Is Away: The Problem Scenario
- The power goes out while you’re on vacation
- The server reboots automatically
- You’re hundreds of miles away
Without the encryption credentials, the server boots into a limited state—the OS is running, but the encrypted pool (and all the services that depend on it) remain locked. You can’t SSH in to unlock it. You need a way to see the boot console to enter the passphrase.
This is a real problem for a homelab that’s supposed to be highly available.
A Tunnel to the Keep: MeshCentral + Intel AMT/vPro
The M920Q has a solution—a secret tunnel that leads right into the keep, if you will: Intel vPro with Active Management Technology (AMT). This is enterprise-grade remote management hardware built into the CPU and motherboard.
Intel AMT provides out-of-band management, which means:
- It works even when the OS isn’t running
- It has its own network interface and power
- It provides KVM (Keyboard, Video, Mouse) access to the boot screen
- You can see and interact with the system as if you were physically there
To manage the AMT connection, I set up MeshCentral in a Proxmox LXC container (CT 107). MeshCentral is an open-source remote management platform that can interface with Intel AMT.
Here’s the workflow:
- Power outage occurs, Volt reboots
- ZFS prompts for encryption passphrase at boot
- I access MeshCentral from anywhere (phone, laptop, etc.)
- MeshCentral connects to Volt’s Intel AMT
- I see the boot console and enter the passphrase
- The tank pool unlocks, services start, everything’s back online
The beauty of this setup is that MeshCentral runs on the Proxmox cluster, which is always available (thanks to HA). Even if Volt is down, I can still access the management interface.
One Key for the Keep: The Keyfile Compromise
To make remote unlocking more practical, I implemented a two-tier encryption strategy:
- rpool (OS pool on NVMe): Encrypted with a passphrase, prompts at boot
- tank (media pool on HDD): Encrypted with a keyfile stored on the unencrypted portion of rpool
Here’s how it works:
- At boot, the system prompts for the rpool passphrase
- Once rpool unlocks, the OS can access the keyfile
- The keyfile automatically unlocks the tank pool
- All services start normally
It’s not perfect, but it’s a hell of a lot better than leaving everything unencrypted because “encryption is too hard to manage remotely.”
The Software Philosophy
Here’s where the story takes a turn. Because up until now, I’d been managing everything imperatively:
- SSH into a machine
- Run some commands
- Edit some config files
- Hope I remember what I did when I need to rebuild
This works, but it doesn’t scale. And more importantly, it’s invisible to LLM Agents.
The NixOS Revelation
I’d been using NixOS on my desktop for a while, and it became clear that Nix paired with LLM agents is exceptionally powerful. An LLM can understand everything about your system configuration from a single file. It just takes one line in the agents.md file, letting them know where the default.nix is, and then when they need it, they read the file.
No “I ran this command six months ago and now I can’t remember what it did.” Everything is in the Nix files.
But more importantly, this stops LLMs from mucking up your servers. Every Nix change is tracked in Git—reverting takes seconds.
This gives you confidence letting LLMs manage your critical infrastructure. Review the changes or don’t—you can revert with one command. Even an unintended consequence from ten changes ago can be found in the git log and fixed.
The Monorepo Approach
I was inspired by notthebee’s nix-config—a single Nix flake managing multiple machines. The idea is simple but powerful:
One repository. Multiple machines. Shared modules.
Here’s the simplified structure of my nixos-config repo:
nixos-config/
├── flake.nix              # Single source of truth
├── hosts/
│   ├── nixos/             # Desktop workstation
│   ├── volt/              # Media server (M920Q)
│   ├── shadowsocks/       # NixOS LXC container
│   └── <future-hosts>/    # Easy to add more
├── modules/
│   ├── homelab/           # Shared homelab modules
│   ├── media.nix          # Media tools and codecs
│   ├── shell-utilities.nix
│   └── security.nix
├── homeModules/           # Home Manager modules
│   ├── fish.nix
│   ├── wezterm.nix
│   └── opencode.nix       # Kyla's config!
└── secrets/               # SOPS-encrypted secrets
Each host imports only what it needs. Want to add a new service? Create a module. Want to deploy it to a new machine? Import the module. Want to see what’s running? Read the config.
But Switching to NixOS Means Giving Up Proxmox High Availability
I didn’t want to lose Proxmox’s HA clustering. It’s battle-tested, reliable, and does one thing really well.
So I made a hybrid:
- Proxmox nodes stay as Proxmox (for HA clustering and ZFS management)
- Volt runs pure NixOS (full declarative control)
- LXC containers on Proxmox run NixOS (declarative services + Proxmox HA)
Best of both worlds.
Running NixOS inside LXC containers isn’t officially supported, but it works remarkably well. You get all the benefits of declarative configuration—reproducibility, version control, easy rollbacks—while still leveraging Proxmox’s HA and migration features. The NixOS Wiki has a guide that covers the setup. I’d love to see this become officially supported someday.
My default LXC template has my SSH key pre-installed, so when I (or my Agent) spin up a new container it’s immediately accessible—no manual key copying, no password prompts.
For example, my Shadowsocks container is defined in hosts/shadowsocks/default.nix:
| |
That’s it. The entire container configuration. I can rebuild it with nixos-rebuild switch, and it’s identical every time.
Declarative Elegance
Here’s what Volt’s configuration looks like (simplified):
| |
Look at that. One line per service. No Docker Compose files, no systemd units to write, no manual configuration. Just enable = true; and Nix handles the rest.
Behind the scenes, each module sets up:
- The service itself
- Required dependencies
- Systemd units
- Firewall rules
- User accounts and permissions
- Data directories
And because it’s all in Nix, I (and more often than not now, Kyla, my LLM agent) can:
- See exactly what’s configured
- Change it with a text edit
- Roll back if something breaks
- Reproduce it on a new machine
This is the power of declarative infrastructure.
The Drawbridge: Caddy and Internal HTTPS
I’m starting to strain the castle metaphor a bit but stay with me—if the router is the gatehouse, Caddy is the inner keep’s guard captain, directing traffic to the right places.
Every service gets its own subdomain (jellyfin.volt.local, sonarr.volt.local, etc.) with HTTPS, even on the LAN. Defense in depth: encrypt traffic inside the castle walls too.
Caddy generates a local Certificate Authority that NixOS machines trust automatically. Mobile devices can grab the CA cert from https://cert.volt.local/ca.crt.
The entire config:
| |
Three lines. NixOS handles the CA, virtual hosts, firewall rules, everything.
My Own Kingdom: The Realization
I didn’t set out to build infrastructure for digital sovereignty. I started with a Raspberry Pi because I wanted to learn, tinker, and maybe save a few quid on subscriptions.
But somewhere between soldering wires to motherboards and writing Nix modules, I realized what I’d actually created: independence.
Every service I self-hosted was one less dependency on a company that could change terms, mine my data, or shut down overnight. My photos, documents, media—all on hardware I control, in my home, under my rules. No algorithmic timeline. No data mining. No surprise price hikes (well, except for Octopus, my energy provider in the UK).
The Current State of the Castle
Hardware Inventory
Proxmox Cluster (3x Lenovo M710Q)
- CPU: Intel i5-7500T (4 cores, 35W TDP)
- RAM: 8GB per node
- Storage: 256GB NVMe + ZFS shared storage
- Role: High-availability container host
Volt Media Server (Lenovo M920Q)
- CPU: Intel i5-8500T (6 cores, 8th gen)
- RAM: 16GB
- Storage: 1TB NVMe + 16TB HDD (modded)
- Role: Media serving and automation
Raspberry Pi 4
- Still running as backup DNS
- Soon to be decommissioned (replaced by NixOS containers)
Total Investment: ~£500-800 (all refurbished from eBay, and half that is for the 16Tb Drive)
Services Running
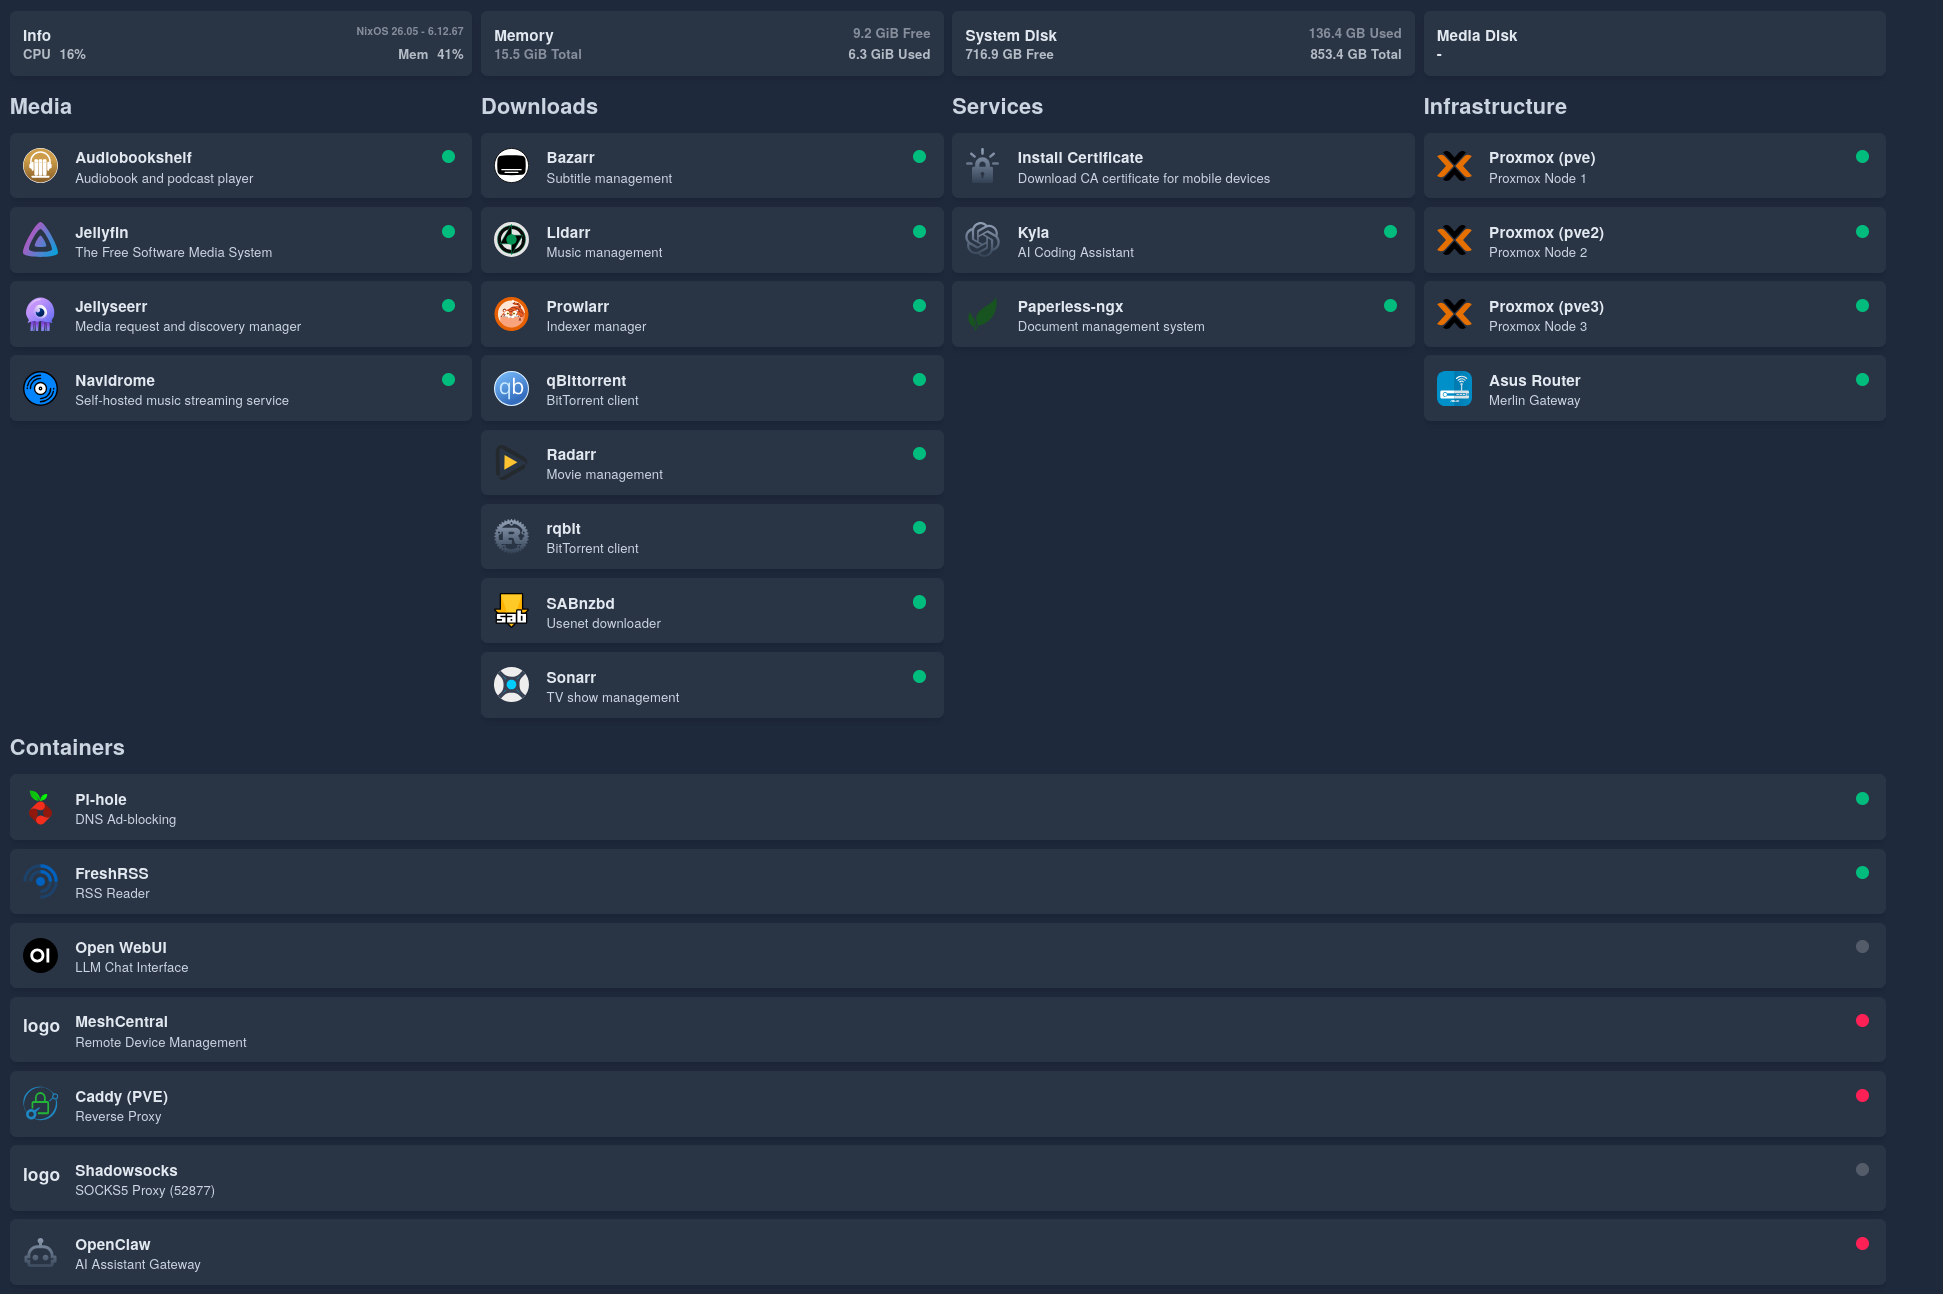
On Volt (NixOS):
- Jellyfin (with Intel Quick Sync transcoding)
- Sonarr, Radarr, Prowlarr, Jellyseerr (media automation)
- SABnzbd, qBittorrent, rqbit (download clients)
- Audiobookshelf, Navidrome (audiobooks and music)
- Paperless-ngx (document management)
- Caddy (reverse proxy)
- Homepage (dashboard)
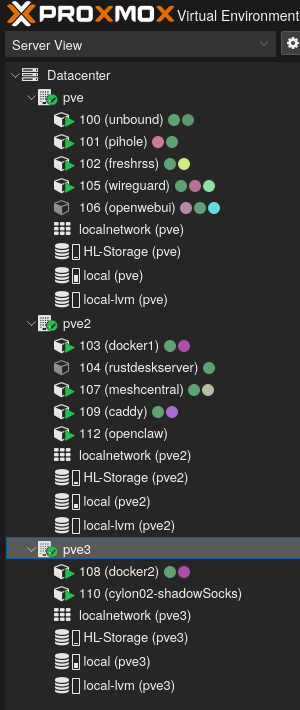
On Proxmox LXC (mix of NixOS and community scripts):
- Unbound + Pi-hole (DNS stack with Quad9 upstream)
- WireGuard (VPN)
- FreshRSS (RSS reader)
- Open WebUI (LLM interface)
- MeshCentral (remote management)
- Shadowsocks (NixOS container)
Network Architecture
Internet
  ↓
Asus Router (Merlin firmware)
  ↓
WireGuard VPN ←→ Unbound + Pi-hole (DNS)
  ↓
Proxmox Cluster (HA containers)
  ↓
Volt (Media + Automation)
Everything behind the VPN. Everything declaratively configured. Everything LLM-readable.
Lessons Learned
1. Start Small, Grow Deliberately
The Raspberry Pi was the perfect starting point. It taught me the basics without a huge investment. When I outgrew it, I knew exactly what I needed.
2. High Availability: Is It Worth It?
If I had to do it again, I might actually ditch the high availability. I’ve never truly needed it—computers only die once every few years.
3. Declarative > Imperative
I can’t overstate this. Managing infrastructure imperatively is like building a castle without blueprints. You might remember how you built it, but good luck explaining it to someone else—or rebuilding it after a disaster.
With NixOS, the config is the documentation. It’s always up-to-date because it’s the source of truth.
4. Design Infrastructure for LLMs
In the past, infrastructure management required deep knowledge of every system. You had to remember commands, config file locations, service names.
Now? The LLM can read the config and figure it out. I can delegate tasks to Kyla, and she can execute them—because the infrastructure is legible.
5. Refurbished Hardware Is Amazing
I spent less than £1000 on hardware, and I have:
- A 3-node HA cluster
- A powerful media server
- Enough compute for dozens of services
Tiny form factor PCs (like the M710Q and M920Q) are perfect for homelabs. Low power, quiet, cheap, and surprisingly capable.
What’s Next?
The castle is never finished. Here’s what I’m planning:
Short-Term
- Decommission the Raspberry Pi
- Migrate more NixOS LXC containers (migrate remaining imperative services)
- Improve monitoring (Prometheus + Grafana, all in Nix)
- Host my own Git repository (something NixOS-configurable like Forgejo)
- Replace Pi-hole with AdGuard Home (NixOS-configurable DNS filtering)
Medium-Term
- NixOS router (replace the Asus with something I can manage declaratively)
- Expand storage (add more drives to the Proxmox cluster)
- Better backups (automated, encrypted, off-site)
- Network segmentation (VLANs for IoT, guests, services)
Long-Term
- Full NixOS migration (even Proxmox nodes, if I can solve HA clustering)
- GitOps workflow
- Agent-driven monitoring and fixes (Kyla alerts me, fixes issues, and I just review the pull requests)
Conclusion: The Castle Stands
They say a homelab is a journey, not a destination. I’d say you’ve arrived when downtime starts to feel unacceptable.
I feel surprisingly happy with the design of my infrastructure, it’s legible. Every service, every configuration, every decision is captured in code (or will be soon). I can read it. Kyla can read it. And if I get hit by a bus tomorrow, someone else could read it and understand exactly how it works.
That’s the power of NixOS. That’s the power of declarative infrastructure. I’m not deep enough in the infrastructure world to make predictions. But it wouldn’t surprise me if all infrastructure is code-managed in the future.
The castle stands. And it’s built on a foundation of code.
Resources
- notthebee’s nix-config: https://git.notthebe.ee/notthebee/nix-config
- M920Q 3.5" Drive Mod: https://github.com/kaysond/m920q-3.5in-drive-mod
- NixOS: https://nixos.org
- Proxmox VE: https://www.proxmox.com
- NixOS Proxmox LXC Guide: https://nixos.wiki/wiki/Proxmox_Linux_Container
Last modified on 2026-02-01